CLICK HERE FOR FREE BLOGGER TEMPLATES, LINK BUTTONS AND MORE! »

Wednesday, December 22, 2010

Gingerbread House Layout

Hi Scrappers :) I hope that everyone is having a wonderful holiday season. I can't believe that it's only 3 days until Christmas. I'm looking forward to the Christmas Eve Service at Christ Fellowship. The children's church is putting on a half hour show then it's the candle light service.  So in one of my previous post I mentioned that I lost my job. I'm still looking and praying for either an employment opportunity or for God to direct me to a different path. I'm considering Nursing. So we will see where He takes me. 

So since I have this "free" time I decided to create a layout for the gingerbread house that I made at a girlfriends house. A bunch of us (7) got together and created gingerbread (graham cracker) houses. 

Materials: 
12x12 Kraft card stock
Snow flake DSP (from my stash) cut at 11x10"
The white snow was free hand cut from an 8.5x11" card stock
Photo Mats: 6.25x4.25", 6x4", 4.24x4.25", and 4x4"
Images from Jolly Holidays and words from Black Letter:
  • House:  5.5"
  • Snowman: 2"
  • Tree: 3.25"
  • Light Post: 2.5"
  • Tree Branch: 2.75"
  • Gingerbread House: 4.29"

Happy Scrapping! 

Friday, December 10, 2010

Jolly Holidays Christmas Cards

Hi scrappers. I'm back again with another post. I'm on a roll. So yesterday I decided to make four Christmas cards using the Jolly Holidays Cricut Lite cartridge that was released on black Friday this year. I was at WalMart at 11:30 pm on Thanksgiving to get mine. Now I've linked this cartridge to my Gypsy before it was wrapped and placed under the Christmas tree (LOL). I just had to play with it. I hope you enjoy these cute cards. 

Materials:
All cards are 4.25 x 5.5" or A2 sized
Base layer: 4.25x5.5" in Kraft (Stampin Up)
Second layer: 4x5.25" in white, Night of Navy, Green Garden, and Cherry Cobbler (Stampin Up)
Third layer: 3x3 in white and Early Espresso (Stampin Up)
Forth layer: 2.75x2.75 in various Christmas patterned paper
All images from the Jolly Holidays Cricut Lite cartridge:
  • Reindeer and all layers cut at 3.25"
  • Squirrel and all layers cut at 3"
  • Penguin and all layers cut at 3"
  • Fox and all layers cut at 2.75"
White Jelly Roll, Black Jelly Roll and Zig Writer pen in Chocolate used for doodling. 
All stamped sentiments are from the Hero Arts Joy to All stamp set.

Thursday, December 9, 2010

Seasons Greetings

Hi Scrappers :)

This layout is totally inspired and scrap lifted from Lauren with Lauren's Creative. She is such a talented scrapper. When I saw her Seasons Greetings layout I knew I had to add this simple yet beautiful layout to my dogs scrapbook. I didn't have any holiday pictures of him scraped yet because I couldn't come up with a layout I was happy with. So thank you Lauren from the bottom of my heart for creating this beautiful layout. I'll be getting the pictures for this layout developed this weekend. (HUGS)!

Materials:

(1) piece of 12x12 kraft cardstock
(1) piece of patterned paper (this was in my stash) cut to 11.5x11.5
(1) piece of red card stock cut to 8x10
Photo mates cut to: 4.5x4.5, 4.25x4.24 and 4.5x6.5 and 4.25x6.25
"Seasons Greetings" (shadow and image) sized at 1.75 from the Christmas solutions cartridge
"Santa and Sleigh" (shadow and image) sized at 5" from the Christmas solutions cartridge
Candy cane ribbon from Hobby Lobby
White jelly roll pen

Merry Christmas everyone and a Scrappy New Year

Oh Christmas Tree & Update

Hi Bloggers :) 

Sorry I haven't blogged in a while but some things have happened here. One of those being I was let go of my job the day before Thanksgiving. It's been tough talking to people about it. I feel like I have let myself down in so many ways. I was unhappy with my job for awhile now. I worked in a public accounting firm and that is what my degree is in. It just never seemed to click and the fact that I never received any training didn't help either. My girlfriend said this to me, " I am a firm believer that God puts us on a path for a reason, and that every hardship we encounter is just preparing us for something greater…I know it sound’s cheesey, but I believe it with all my heart". I have to agree with her 100%. I am considering pursuing a degree in nursing now. I've done a lot of reading about the associates program near where I live and it does seem like a lot of work but very rewarding work. I've asked a few of my friends if they thought I would make a good nurse and I haven't had one bad comment yet. So I need to pray about this and see where God leads me. 

Now on to the good stuff. I created these snowflake tags for our gifts under our Christmas tree and the other tags were created during my Stampin' Up club. (Please forgive the quality of the pictures. I used my cell phone.) 

This little tree was made by my father using the George & Basic Shapes Cricut cartridge. The three pieces for the tree are cut at 4", 3.5", and 3". Each circle is folded four times and then refolded using the mountain/valley technique. The star is from George as well and is cut at 1.5". A wooden stick is poked through the center of each folded circle and slid up the stick to create the tree. The star is attached using a glue dot.  

Thank you for listening to me vent a little and stopping by to see the projects that I have been working on. 

I'll be posting a scrapbook layout here in a few that was inspired by Lauren with Lauren's Creative. I just love all that she does!

Merry Christmas everyone and a Scrappy New Year 
  

Thursday, November 25, 2010

Happy Thanksgiving

Hi Scrapers,

I just wanted to wish everyone a safe and wonderful Thanksgiving :)

Happy Scrapin!

Sunday, November 21, 2010

Blessing Mix

Hi scrapers :) I bring you my version of the "Blessing Mix" that I saw Angie with Chic-n-Scratch do a few weeks ago, or you may of seen Tracy with Craft Junkie Too do something similar as well.  

Blessing Mix Poem:
The Bugles are a symbol of the Cornucopia, a horn of plenty.
The Pretzels represent arms folded in Thanks & Prayer.
The Candy Corn reminds us that during the first winter, the pilgrims were allowed only five kernels of corn per day because the food was scarce.
The Fruit is a reminder that Thanksgiving is the celebration of the harvest.
The Peanuts represent seeds, the potential of the bounteous harvest of the next season if they are planted & well-tended.

Materials:
Turkey is cut from Create-a-Critter at 2.5"
The paper rosette was made by using a 12x1.5" strip of paper and scoring at every .25". When that is finished fold on each score line using the mountain/valley fold. See this video for a better explanation. 
I used Diamond Stickles around the edges to give them a little glitter. 
The poem was printed for Angie's PDF file she has available here.


I filled cello bags with bugles (I couldn't find the original so I used chocolate/peanut butter), pretzels, candy corn (only 5), orange slices, and peanuts. 


I hope you have enjoyed my Thanksgiving Blessing Mix treats. I gave these to my co-workers, my mom, and a neighbor that helps me out with sewing projects. 


Happy Scraping!

Wednesday, November 10, 2010

My Pumpkin

Okay, this will be my last post for tonight. Shew, getting caught up is a lot of work. For this project I created a 1 page scrapbook layout of my boy Solomon with his pumpkins. It was quite a job cutting his pumpkin to look like him. Thankfully, I found a template to use on Better Homes and Garden.

Materials:
Imaginise Apple Cider collection used.

(1) 12x12 piece of the wood grain used as the base.
(1) 12x12 piece of the green used for the scalloped square cut at 10.75 x 10.75 from Mini Monograms
The words "My Pumpkin" are also cut from Mini Monograms and I used the hide contour feature to hide the stitching lines.
(2) photo mats both fit a 4x6" picture. The mat sizes are 6.50 x 4.50 and 6.25 x 4.25.
(3) pumpkins cut from Create a Critter. (1) pumpkin and all layers cut at 2.5" and the (2) smaller pumpkins cut at 1.75"
(1) wood stump and all layers cut at 1.75" from Create a Critter
(1) squirrel and all layers cut at 2" from Create a Critter
(1) acorn and all layers cut at 1"
I used my Jelly Roll white pen do doodle on the stump, squirrel and pumpkins.

Happy Scrapin

Happy Birthday

WOW, another blog post in the same day! I'm on a roll. So I created this cute cup cake card for my dad's birthday. I was trying to figure out a way to make something cute but be manly. So what better way than to use the color blue. Perfect! 

Materials:

Crumb Cake SU card stock cut to 5.5 x 4.25"
Cup Cake cut from Create A Critter at 3"
I used to hide contour feature to hide the face and I used a Peachy Keen face stamp.
The brown patterned paper is from the TPC Studio Homeroom stack and it's cut at 5.5 x 2"
Happy Birthday is from the My Pink Stamper Family & Friends stamp set (I cut the stamp in half to separate the two words). 
White pearls are from my stash.
I used a Jelly Roll black pen to doodle around the cupcake and a white Jelly Roll pen to doodle around the outer edges of the card.

Happy Scrapin :)

Christmas Cards

Hi Scrapers,

Well here I am again with another project. Here are the two Christmas cards that I will be sending out. I have about 12 done and I need to make about 50. I ran outta my Stampin Up paper so I've been on hold with them for awhile. I have another Stampin Up club meeting this Sunday, so I'll be putting in my order and get these cards wrapped up PDQ! 

So what I've done here is I've created the card front and will adhere the card front to blank white prescored cards I picked up from Joann's.


Materials: 

Card #1:
Crumb Cake SU paper cut to 5.5 x 4.25" 
Dotted paper cut to 4.25 x 3.75" and adhere to top of card
Punch green card stock (Old Olive SU) 4.25 x 1.5" wtih scallop edge punch. I used a Fiskers threading water punch and adhere to card.
Cut red card stock (Real Red SU) 4.25 x 1.75" and stamp sentiment on left side. I stamped in VersaMark and used white embossing powder then heat embossed.
Cut striped patterned paper 4.25 x 1.5" and adhere.
I used the Hero Arts "Joy to All" stamp set.

Card #2:
Crumb Cake SU paper cut to 5.5 x 4.25"
Cut green card stock (Old Olive SU) 5.5 x 2.5" and stamp the sentiment on the left side. I stamped in VersaMark and used white embossing powder then heat embossed. I used my Cricut and Gypsy and welded a circle cut at 1.75" to a 5.5 x 2.5" rectangle I got from George and Basic Shapes. You could use a 1.75" punch to get the same effect.
Adhere the image behind the circle window using dimensional adhesive (SU dimensionals)
Cut red card stock (Real Red SU) 5.5 x 1.5 and punch with a scalloped edge punch. I used a Fiskers threading water punch.
Cut patterned paper 5.5 x 1.5" and adhere to card front as shown.
Adhere green window card (Old Olive SU) piece to card using dimensional adhesive. 
I used the Hero Arts "Joy to All" stamp set.

Monday, October 25, 2010

Update

Hello by blog friends. I know it has been awhile since my last post...well over a month actually. Not a whole much craft wise has really happened. So I have a few projects that I have already given to people. One of which was inspired by Sarah at Live, Love, and Scrap. My mom needed a birthday card and Sarah has made some beautiful cards using the Sweet Treats Cricut cartridge. So I thought that mom and I could size it down to a standard A2 sized card. 


The next card was made for a friend of mine that was hospitalized. The card put a smile on his face :)


The final card was made for my wonderful boyfriend. I saw Joy with Obsessed with Scrapbooking make this card as a Christmas card. I was so fascinated with it I decided to give it a go.


Well my scraping friends I'm going to finish making my little coffin boxes to give to people for Halloween. I'll share those when I'm finished. Also, I finished making my holiday bows for Christmas. I'll try and get a few pictures off all of them.

Sunday, September 12, 2010

My Little Gator

So my creative side is still flowing :) I have another scrapbook 1pg. layout. As most know it is football season. I am and will always be a Florida Gator. So with that said, my dog will always be my little gator! The jersey in the picture was passed down to Solomon from my first boxer Jakin. It was his jersey and when he passed on to the Rainbow Bridge it became Solo's. 

This is a 12x12 layout. The brown circle is the inside piece to the Solomon & his Duck layout. I then cut 1' circles to create the scalloped edge. The scalloped edge along side the picture is from Just Because Cards and it's cut at 1.56x6" on "real dial size". The bracket is cut at 1.63x5" on "real dial size". The bracket is from the Home Decor cartridge. The cute little gator and all his parts are cut at 3.23x1.23" and he is from the Create a Critter cartridge. I don't have a cartridge that cuts a football so I made my own by using an oval from the George and Basic Shapes cartridge cut at 1.85x2.50". I then cut two small strips of white paper and adhered them to the brown oval. I used my Elmer's Painters paint marker in white to draw on the stitching lines. If you have any questions just leave me a comment and I'll try and get back to you as soon as I can. 
So last weekend I found myself at Michaels. I also go straight for the dollar spot as most people tend to do. Ran across these cute containers that looked like buttons and contained buttons within them. I picked up the red, green, and white ones figuring I could make small cute either gift tags or cards for gifts this holiday season. See I need to start on my Christmas cards early this year because I have over 50 to send out! I know that's a crazy amount but I always participate in a Boxer (dog) Christmas card swap :) and the list keeps growing. Also, so enough rambling and on to the cards. 

The cards measure 4 1/4 x 2 3/4" or just cut a 4 1/4 x 5 1/2 in half and bingo! I then placed the buttons on the card and it just all came together. It wouldn't be complete without a little stitching along the edges.  Let me know what you think.

Sunday, September 5, 2010

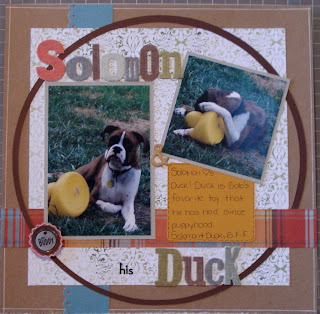
Solomon & Duck

Alright, so my crafting mojo has really been flowing this weekend :) Here is another layout I did for Solomon's scrapbook. I hope you enjoy. Inspiration from the Two Peas in a Bucket website gallery.


Thanks for stopping by :)

Recycled Crafty Ideas

Hello my blogging friends :) It's been a while again since my last post. I am sorry for that. I have been finishing the Harry Potter series (again) and I just couldn't put it down...not even to blog and/or craft. If you haven't read the series you should. It just isn't a children's book. I love them all and hopefully one day soon I'll be able to visit the Wizarding World of Harry Potter in Orlando FL. I am such a junkie of HP that I own a set of robes (Gryfindor of course), two wands, and an entire Gryfindor outfit. I know what you are thinking...this girl needs some help. HA! I love it! 

So on to what this blog is actually about. A few weeks ago I attended a Thirty-One party at a friends house. I noticed these cute little pens she had and decided that I could recreate these, and so I did. They were super easy to make. 
So here's how you can recreate it. I bought a bunch of flowers (there were all grouped together). I clipped about 2-3" of stem and removed any leaves. I bought a 10 pack of BIC pens and removed the lids (you wont need these). I then paced the flower and stem close to the pen and started to wrap the floral tape around the flower stem and pen until i reached the end of the pen. I filled a candle jar and a cleaned jelly jar full of small rocks and placed the flower pens in the rocks. Perfect :) I now have a cute useful fall arrangement.  

Next on the list of crafty ideas is recycled tomato container. I saw Kerry do this on YouTube. Her channel name is "pantala40'. I highly recommend watching her :) So anyway on to the project. 

So here's how to do it. I took one cleaned out cherry tomato container and measured the lid part that is kinda sunken in (this part will vary depending on the size of the container you use). I cut two of the shapes for the top and then the other is for the inside so you wouldn't see the label and the adhesive. Next I stamped the cute Christmas tree in gold ink and layered it on some green and then red card stock from Basic Gray. I popped that up on pop dots. I filled the inside with raffia and placed four cranberry colored votive candles inside. I closed the lid and trimmed any pieces of raffia that were sticking out. I tied the cute harvest colored ribbon around the entire container and it was finished. A quick and inexpensive gift to give family, friends or even coworkers for the holidays. 

Stay tuned for the next crafty project from the Mad Scrapper :)

Saturday, August 21, 2010

Heartfelt Thanks

So I am really sorry that I haven't posted in awhile. Life just got super crazy at home and work and it didn't leave any time for scrapin, crafting, or bloggin. So I am sorry to all those that are following.

So first on the list is a card I made to enter into Emma's Throwback Thursday challenge over at My Creative Time. The theme was "Frame It" using Paper Doll Dress Up Cricut cartridge or any older cartridge you have. Well I do not own many of the older cartridges since I just started collecting cartridges at the end of 2009. So I was flipping through the "Just Because Cards" cartridge and ran across the cutest tree with a swing. I thought it would make a beautiful thank you card. So without further adue here is my Throwback Thursday Challenge entry :) I hope you enjoy it.

Recipe:
Kraft card stock cut at 4.25 x 5.5" the long way
Cream card stock cut at 4 x 5.25" using the Cricut cartridge George & Basic Shapes
Patterned paper cut at 3.75 x 5" using the Cricut cartridge George & Basic Shapes
The patterned paper cut has a shape from Just Because Cards cut in the middle to form the frame.
The tree is from Just Because Cards and cut at 3 x 3.59"
The dark green tree top is cut at 3 x 2.44"
The patterned paper layer is cut at 3 x 2.44" and pop dotted on the dark green tree top layer
The stamp is from My Pink Stampers Every Day Occasions stamp set
I used an Elmer's Painters opaque paint marker in white for the corner dots

Happy Birthday

Alright, so on to the other card I made recently. I made this for a good friend of mine. It was her birthday weekend last weekend and what better way than to celebrate with a cupcake of your very own. So here is the yummy card.

Recipe:
This card was created in my Gypsy.
I used the Cricut cartridge Sweet Treats for the entire card.
The cup cake wrapper was cut at 5.20 x 6.10. I took 1 cupcake wrapper, then copied that first one, flipped it and rotated it so the two would fold up on each other. I welded two rectangles from George & Basic Shapes so it would form a pocked when folded onto itself.
The striped layer was a layer for the cupcake wrapper cut at the same size as the base.
The cupcake was cut at 3.72 x 4.65". I did the same thing with the cupcake that I did with the wrapper. I grabbed the first cupcake and flipped it and welded the two at the cherry.
I cut the remaining parts (cherry) at the corresponding size to the cupcake.
I added a little bling on the cherry.
The "Happy Birthday" is a My Pink Stamper "Friends & Family" stamp.
Ribbon is from Hobby Lobby when it was on sale a while ago.

Thursday, July 29, 2010

Harmony

So my wonderful boyfriend ordered me a new Cricut cartridge...Pagoda. We both had seen this cartridge in Michaels and liked the images on the back. So the sweet package arrives at my house a few days ago. I link my new cartridge to my Gypsy so I can start playing. I was having a bit of creativity block so I started to surf the internet for ideas. I came across this card made by Card Creations by Lorraine. I thought I'd give it a go and see what I came up with using the ton of scraps that I have. So here is my take on Lorraine's card. I hope you enjoy.

Monday, July 26, 2010

Holiday Gift Bow

WOW, I'm on a roll with these blog post. So I was surfing over at the Cuttlebug Challenge and ran across a project that Beth one of the Cuttlebug Challenge designers did. Since my family is on an extremely tight budget it occurred to me that I could make our Christmas bows this year by using this technique. You could make smaller bows by altering the sizes of the paper. So here it is...my first bow using Beth's technique. I hope everyone gives this a try this at least once. It was so super easy. If you try it post a link in the comments so I can see how yours turned out. 


Happy Scrapin Everyone!

Click here for the --> Holiday Gift Bow tutorial.

Sunday, July 25, 2010

Toad-ally Fabulous

Hello my fellow crafters. I hope all are having a fabulous weekend. I am attending a Stampin' Up workshop in a few hours at a friends house. I'm super excited! I hope I can get a few of these girls together once or twice a month to scrap. Anyway, onto the card I did this morning. I'm thinking about doing a series of Create-a-Critter shape cards. So the first is this cute little froggie found of page 24 of the booklet. 


Recipe:
I used my Gypsy to weld to of the "base" frog shapes together.
Cricut cartridge used: Create-a-Critter
(The Froggie and all his parts are cut at 4")
Paper used is all from my scrap box. 
White jelly-roll pen was used for the faux stitching. 
My Pink Stamper Punny-licious stamp "Toad-ally Fabulous!"

Saturday, July 24, 2010

Pink ATG 714 Gun

So let me start by saying that I've seen so many people who own an ATG gun. I was first intrigued by these a few months ago. I did a quick search online for them and found that they can be expensive. So for the time being I continued to use my Tombow mono adhesive and I got a Glue Glider Pro. Now I really like my Tombow and GGP because they are small and transport easily. Well back in June 2010 I got down wind that Custom Crops was having a pre-order on a Pink ATG for $29.99. It was to good to be true I thought, so I took the plunge and pre-ordered one. I received two separate emails stating that the guns were on back order. It should of shipped out July 5 then was pushed to July 19 and finally August 9 and I placed my original order on June 17. Then just last week while I was searching the Cricut message boards I came across a thread that said Michael's craft stores were going to be selling these Pink ATG guns in stores. My father called up to both Michael's stores we have in our area and they said they knew what he was talking about, but they weren't sure if they got any in on their last trust load. 

Well, fast forward to Friday night. I finish dinner with my boyfriend at one of my favorite Chinese restaurants and head to Michael's so I can browse what is in the store. Well, OMG....there it was. My Pink ATG gun was just sitting there on the self all by itself. And wouldn't you believe it I didn't have my 40% off coupon on me. I was bummed. I thought that if I left it there it wouldn't be there in the morning. Well we ended up leaving without it because I didn't want to pay full price knowing that I had a coupon. We head back to the house and I get my coupon and back up to Michael's keeping my fingers crossed that it is still there. We both make a B line for the isle we found it on last night and it was still there. 

So I am the proud owner of a Pink ATG 714. I already love it and can't wait to use it. 

Also, at one of the many WalMart in my area they had ALL 24 of the Cricut Lite cartridges. Just though I'd share that with everyone too.


Thursday, July 22, 2010

Make A Wish

Well here it goes, my first ever blog post. I'll have to back post to get caught up on all the projects I've completed since I started my journey into paper crafting. 

This layout is of my boxer, Solomon Boaz and his first birthday. Birthdays are always special in my house so we celebrated with a professional doggie cake which tasted like peanut butter. I hope you enjoy the layout as much as I do. 

I am entering this into Emma's Throwback Thursday challenge. I do not own the Celebrations Cricut cartridge so I used the only birthday cartridge I have...Sweet Treats! It was one of the first cartridges I was given with my "baby' bug. 

Solomon's 1st birthday layout
Recipe used:
Sweet Treats Cricut cartridge: Make a Wish shadow is cut at 2.42". Make a Wish is cut at 2.45"

Paper used is DCWV Pet Stack and Martha Stewart School Days Multimedia pad.

March stickers are from SEI and the 12 and 2009 are vinyl Thickers. 

The dogs are cut outs from the Pet Stack paper pad.